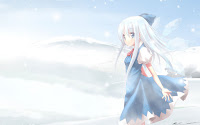
 On top of collecting figurines/gundam models and looking at new release information/reviews of them, in my spare time, I would also use photoshop to edit pictures into wallpapers or digitally store tangible images (ie posters).
As promised, I will talk about the wallpaper of Cirno which I editted. First a vector was needed, a vector is the picture of focus, I would say (usually a person, in our case, an anime girl).
I might not know much about art, but being someone who enjoys it, I have a basic understanding. I also took traditional art and computer art in highschool. Computer art was the best and worst course at the same time. D: Basically, we were given tasks to do, but the teacher didn't teach us how to do it, we just looked for tutorials. So it was really it DIY course. Worst course ever... is what I want to say, but the freedom given because the course was layed out that way was kinda fun... It was a good experience nonetheless.
Basically, when I edit a work, first thing to do is find a vector, and here is the one I used.
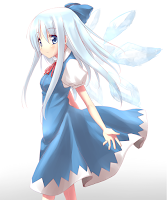 So now that you have a picture, you need to crop out all the unnecessary bits, ie background. This part takes probably the most time for me, using the polygon lasso. Some people prefer magnetic lasso, so try different tools and do what fits. Beware though, from experience, I think magic wand isn't a very good tool for this kind of jobs, but if you wish to use it, its up to you.
After the vector picture is fully cropped out, ie the background is now transparent, its time to make the background !
Some people likes to make abstract backgrounds, in that case, you would probably go to google and find an abstract tutorial and use it. I on the other hand prefer something more fitting with correspondence to the vector. Since Cirno is a snow fairy, I decided that a snowy background was in order... Then came the hardest part of the whole work...
As I mentioned before in my first post, I CAN'T DRAW!
So how would I go around making snow? I went searching for tutorials on snow, but the only results were falling snow (which I also added to the picture, I'll cover that next). After loads of searching and couldn't find any good tutorials, I had to go another route.
It was a good thing I kept a folder of pictures I liked from various artists (random web browsing). And I found this previously.
 Lucky! A snowy background which is somewhat anime-like. I couldn't use real snow photographs either because anime and reality doesn't mix well. So apologies for using other people's work, I hope I have their approval.
This message speaks for both images that I've used, because I found the images at imageboards, I don't have the source for them, so even though I wish I could put in the artist's homepage, but I can't... Sorry. >_< href="http://touhou.wikia.com/wiki/Flandre_Scarlet">Flandre above, then enlarged it into the new wallpaper with Cirno. Because of the available room, the section I took had a tree in it, I had to remove it. Why? Personal taste, I guess. So I took out the cloning tool, and made it disappear that way. For cloning, just try to make colours of the adjacent snow look similar to what you're working on. Though I was taught in computer art that when you clone you should actually clone from an area further away from where you're working, I find it easier to just clone from someplace closeby, since the colour differences will be lesser also.
Finally, I wanted to add some snowfall. That could be done by following simple photoshop tutorials, like this one.
I also drew in white circular dots for another type of snow. Using a brush with gradual fading edge of different size.
On top of the snowfall, I also added fog, which is just from using clouds with black and white, setting the opacity to something less than 100% and setting the layer type to screen.
When you're done, you'll have something like this. I made the resolution to 1680x1050 because thats my window resolution.
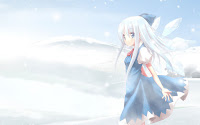 At this point, I would say it looks about done. But I wasn't satisfied with the wings not being transparent, so I did the last step to select the wings, cut them from the vector layer, paste it on another layer, then set the opacity down from 100%. Then I tested out my new tablet and signed my name on it. (Fun, but not as fun as using a real pen and signing it on a piece of paper). Haha...
This was what the final product looked like.
 I will include a download link for the psd file of what I did, I hope it serves as a decent starting point for people who are interested in photoshopping. I am in no way a professional at this work but I have atleast done it a couple of times.
DL
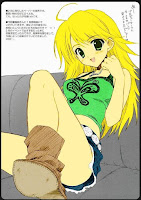
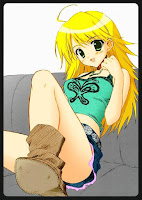
Some other work.
Banner:


Colouring:




No comments:
Post a Comment