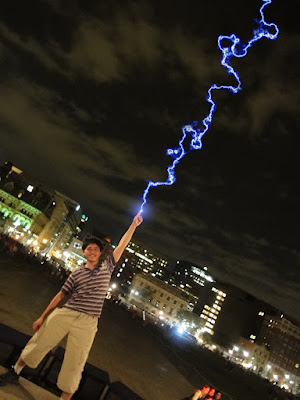
I decided to play around with a photo taken by my friend at mosaika. The pose is supposedly from Tengen Toppa Gurren Lagann, from Kamina. "Your drill will be the one that pierces the heavens" or something like that. The lightning has nothing to do with anything, but I just made it anyway.
The steps aren't that difficult. I remember doing something similar to this back in grade 10 highschool. So I roughly remembered how to do it.
I started with a photo like this one (resized).
- First, open the photo in photoshop.
- Then start a new layer so you could work without impacting the original image.
- Set your colours to black and white
- Make a gradient of black to white horizontally (left to right) or diagonally
- Basically the line where the colour changes is where your lightning will be
- Go to filters -> render -> difference cloud
- Go to adjustment -> levels
- Move the black triangle to the right or adjust the triangles to get a crisp lightning shape
- Go to adjustment -> hue/saturation
- Check the "colourize" box, this will give it a colour
- Change the hue to the colour you would like
- Now change the layer type from normal to screen, the lightning should appear on top of your original image
- Move the lightning via "free transform" to where you want it to be, rotate if needed
- Using the eraser, remove any unwanted lights in the lightning layer
- Take the smudge tool and go to the end of the lightning and smudge it so it doesn't look like it was cropped, smudge tool is the finger icon, in the same place as the sharpen tool or blurr tool
- Now I added a lens flare to the start of the lightning at the finger of the image, it makes it fit a bit better than without
- To do that, make a new layer, paint it black
- Go to adjustment -> render -> lens flare
- Set the size to a small size, this can always be changed later with the free transform adjustment
- Change the layer type to screen
- Move the lens flare to where it should be
- Readjust size with free transform if needed
And voila, you're done !


No comments:
Post a Comment